Beach Day and a short Hike
Anyway final video uploaded on vimeo
http://vimeo.com/32643995
Friday, November 25, 2011
Thursday, November 24, 2011
Wednesday, November 23, 2011
Tuesday, November 22, 2011
Day57: My Presentation
Today is the day, the day to present our final work.
To our superior and comrade.
To our superior and comrade.
Monday, November 21, 2011
Day56: Shots Breakdown
So I've been working on shot breakdowns, basically showing the separated render passes and how they are put together as a final shot.
Sunday, November 20, 2011
Friday, November 18, 2011
Day55: Preparing for presentation
So I've been preparing the presentation.
Gathered all my RnD images and test renders.
Prepared my power point slides.
Gathered all my RnD images and test renders.
Prepared my power point slides.
Thursday, November 17, 2011
Day54: Fixy fix
As usual there is always some last minute problem.
Be it missing frames
Final touch up
Output compression messed up
Wrong file format
Sound off sync
so on and on.
But it's all under control!
Be it missing frames
Final touch up
Output compression messed up
Wrong file format
Sound off sync
so on and on.
But it's all under control!
Wednesday, November 16, 2011
Tuesday, November 15, 2011
Day52: Tools of the trade
Since I don't have much to post on my project, I'll just post something more general on the CG topic.
A general production pipeline
Model
Character Rigs and Props
Layout/Blocking
Animate
Light
Render
Composite
Effects would come in between layout to composite stage
Particles and Dynamics
Simulations
Lighting
Render
In depth look:
Start from story/concept art
Preparing assets includes
Modeling
UV Layout
Texturing
Lighting
Rendering
Compositing
So once the art is done, it's passed on to the modellers/sculptors to prepare the 3D models. It could be a hero character that is gonna save the world, a sexy partner, cute little pet, weapons of mass destruction, a barrel that's gonna roll down a hill and so on. Basically anything that is needed in the 3D world depending on the project/shots.
Once the Character or Prop is modelled it needs to be Textured in order to see colors, patterns or whatever the details that is needed for that character or prop.
Before texturing that is also a process known as UV layout, where you specify how the texture is gonna be paint on the character or prop.
As technology progresses we have a new workflow which doesn't require UV layout. The format is known as PTEX, basically the texture artist could just paint on the 3D model itself.
Rigging, doesn't have to be a character rig. It could be any 3D object that is needed to be hand animated. It could even be a awesome camera rig to simulate real life camera movement.
The process of setting of bones, controls and UI for animators to use em to animate.
Making characters come to live.
Comes lighting to give the scene more live, a sense of time, a feel of mood and so on.
Lighting is really important as it's kinda driving the look and the end result would be quite dependent on it.
A good workflow for lighting would be the HDR image base lighting.
Future lighting workflow should be the Linear workflow, which is another deep subject.
And if you're working with moving background plate, you're probably gonna include tracking.
If background plate needs cleaning up, you're probably need to handle rotoscoping.
So what are the tools?
Houdini
Maya
3Ds MAX
Modo
Blender
ZBrush
and any other 3D software packages.
Nuke
Mari
3D Coat
Monday, November 14, 2011
Day 51: Tricks of the trade
Tips for compositing CG into live background plate.
Try to almost always add a little bit of blur to the CG, CG renders tend to be too sharp where as in real life what we capture from the camera is always blurred somehow, motion blur, depth blur etc...
After importing the CG render good idea to add a gau blur of less than 2 px, but it really depends on the scene. The bigger the scene the more blur and if it's moving super fast compare to slow movements and so on.
Lightwrap, this will help integrate CG into the background plate by blurring out the edges of the CG and letting light from the background plate affect the CG render.
Adding grains to the composition or the CG renders itself can help sell it better. It's little imperfections that helps CG integrate into live background and sell the effect.
Lens Distortion, this is a more complex technique which could be used to help enhance the shot. Basically the live background plate have to be undistorted first, comp all the CG stuff and add a final lens distortion.
Edge blur, sometimes the edges of CG renders are just too sharp so you might wanna blur out just the edges to help soften the edge and make it integrate better.
Sunday, November 13, 2011
Weekends 11: We stumble, we fall but we keep moving!
Read others blog, cause it's pretty much the same.
Friday, November 11, 2011
Day50: Five to Nill
Have been working on compositing shots that are rendered out.
Some tips that I've picked up from video tutorial.
OpenEXR format
4 X 16 (Half): Usually good enough for passes that deals with colors, like the diffuse, specular and reflection.
4 X 32 (Full): Pretty much a must for data passes like Z depth and motion vector. Because you want these datas to be as accurate as possible.
So when rendering in Houdini, to render out un premultiplied images be sure to set the pixel filter to Closest Sampling Filtering (minmax min). Important to set that filtering for data passes!
Multi-layered EXR can slow down compositing softwares such as Nuke.
It might be a good idea to render out those layers as individual sequences.
Eg Nuke: Read in the file > Shuffle out the layers > Write Out
Using Nuke to write out the EXR files can be a good idea as well as Nuke is better at rendering openEXR format and the compression type is ZIP Scanline which is very efficient compared to tiling base compressions.
Thursday, November 10, 2011
Day 49: Nth = Nothing
So my files are set up and ready to render in the render farm.
Nothing much to update because I have to wait for the renders which is gonna take awhile.
Nothing much to update because I have to wait for the renders which is gonna take awhile.
Wednesday, November 9, 2011
Tuesday, November 8, 2011
Day47: Everyday I'm rendering...
So still rendering out shots...
Nothing to show yet.
Slap comps would be out by tomorrow.
James suggested that I add more whipping motion to shot where the bboy is handhopping.
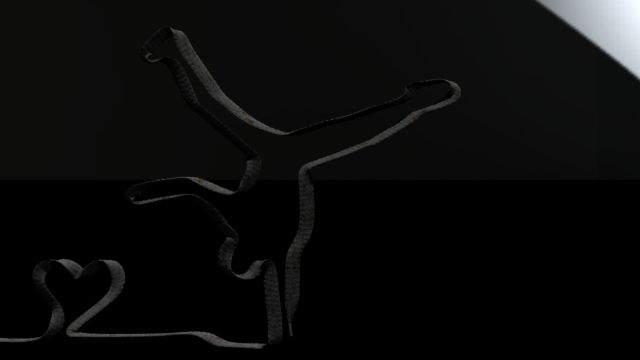
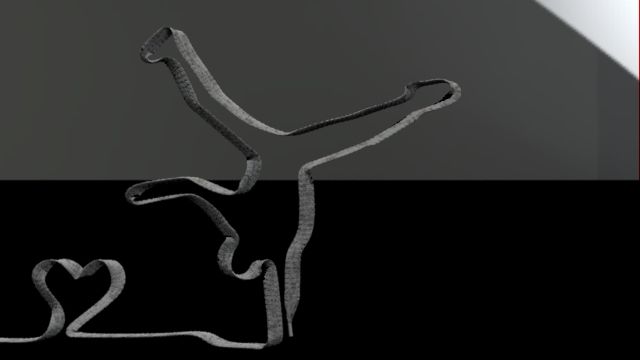
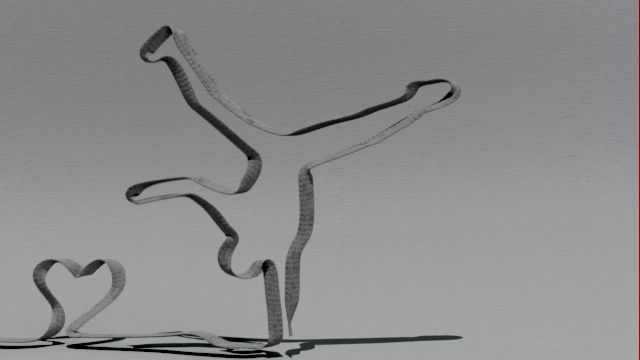
Wire dynamic sim for my end shot where the bboy freezes and then the shoelace collapse as an end.
Nothing to show yet.
Slap comps would be out by tomorrow.
James suggested that I add more whipping motion to shot where the bboy is handhopping.
Wire dynamic sim for my end shot where the bboy freezes and then the shoelace collapse as an end.
Monday, November 7, 2011
Day46: Hell, It's about tyme...(Render Time)

So in total I have about 8 shots.
5 Main shots and 3 short shots.
Rendering my sh040 on the render farm.
By end day I should be able to comp out the sh040 and starts rendering my sh050.
Sunday, November 6, 2011
Friday, November 4, 2011

Thursday, November 3, 2011
Wednesday, November 2, 2011
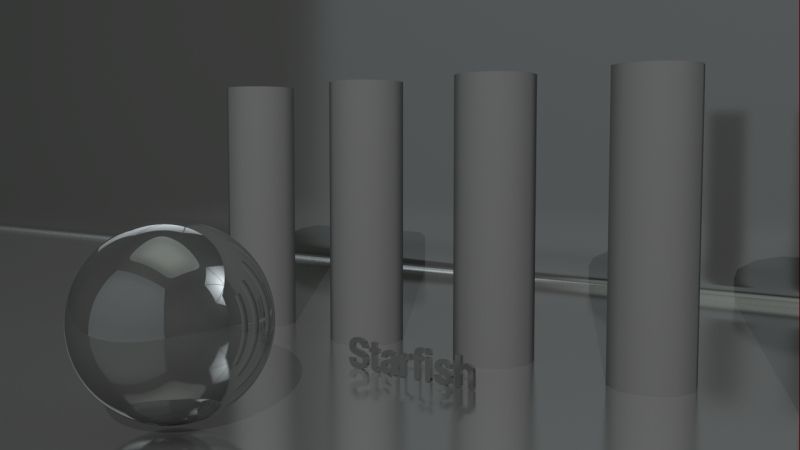
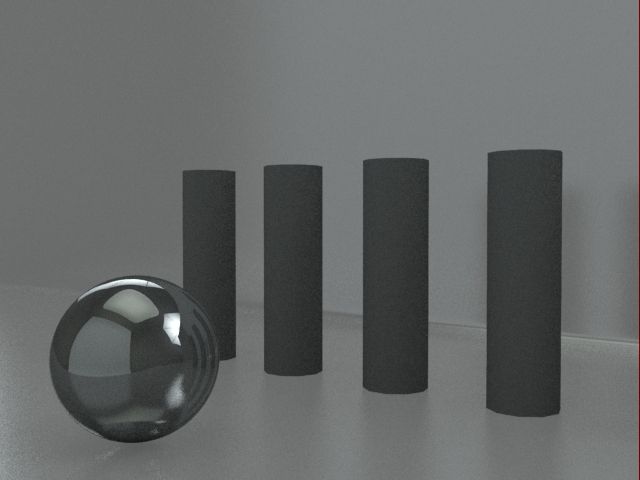
Day43: Keep the core tight!
Updated my shoelace shader with variation markings.
The first problem was there isn't any rest position so the markings doesn't stick.
In order to help see the markings clearly, I've change my colors temporary
To a higher contrasting colors
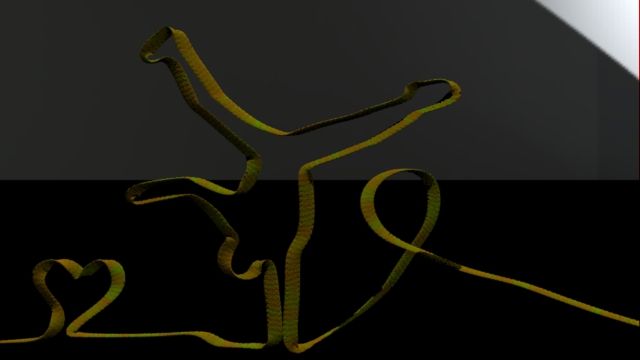
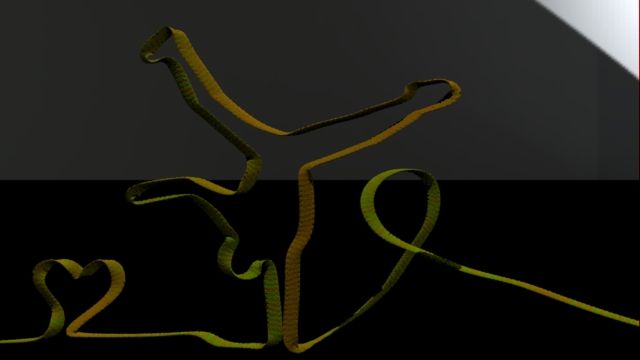


So once the pattern is what I wanted, I started changing back to the original colors to see if it still works.
Tweaking it to make it subtle so viewer kinda see the markings but then again not see so much.
Tuesday, November 1, 2011
Day42: Crunch Tyme!
Mentor James have us list out the things we left to do and give it a date.
This Week
Secondary Motion by Thurs (3/11)
Shoelace Shader by Fri (4/11)
Finalized backdrop by Fri (4/11)
Next Week
Pre-Viz by Mon (7/11)
Lighting (8/11)
Finishing Shot (10/11)
Rendering (8/11)
Week after
Compositing (14/11)
This Week
Secondary Motion by Thurs (3/11)
Shoelace Shader by Fri (4/11)
Finalized backdrop by Fri (4/11)
Next Week
Pre-Viz by Mon (7/11)
Lighting (8/11)
Finishing Shot (10/11)
Rendering (8/11)
Week after
Compositing (14/11)
Subscribe to:
Posts (Atom)